Now I’d like to talk about some of the nitty gritty details in making 3D artwork for the Alioscopy display. In my earlier blog posting titled Miles Regis – Behind the Scenes “Making of a 3D art Piece for Coachella” you probably all caught me saying “and with some slight of hand--we can create a 3D file compatible with the autostereoscopic display from Alioscopy.”
This blog post takes a closer look at how we used Photoshop to create files compatible with the Alioscopy autostereoscopic display.
If you want to learn more about autostereoscopic displays, here's a good starting point describing the technology. Autostereoscopic displays are simply displays that let you perceive 3D without having to wear special glasses. If you remember what 3D postcards where like, autostereoscopic displays are very similar to those. Adobe Photoshop already has the ability to generate 3D postcards. So my job was to figure out what twists and turns I might need to make to get this built-in ability to be useful for the Alioscopy autostereoscopic display.
For those interested, there is a great book by those folks who have taken a lead role in creating Photoshop for us, (including Zorana Gee and Pete Falco) called 3D in Photoshop – The Ultimate Guide for Creative Professionals. At the back of the book you can find a sample of one of those 3D postcards I’ve been describing. The basic techniques I used to create the artwork were from chapter 8 of the book, entitled, “3D and Compositing with Bert Monroy” particularly section 8.1 “Simple Complexity”. These pages describe some of the many features built into Photoshop that allow you to create 3D environments. In particular, I heavily used the tool called “3D postcard from layer”. I provided a very detailed account in a previous post of how I created the original 3D image, so I won’t go into that here. Let’s assume you’ve already created a 3D image in Photoshop, and discuss you how to get it on an Alioscopy display.
In order to do this, all you really need to know are some details about the Alioscopy display, the image you have made, and of course how Photoshop creates lenticular images. Everything you need is already there--it just needs to be “translated” a bit.
SIDEBAR
Alioscopy displays are known as 8-view displays. This means that 8 views are encoded into the display, and are repeated over the entire width of the display. Each eye sees one of those 8 views, i.e. our brain receives two views from the eight and constructs a stereoscopic understanding of the image. Depending on how far apart your eyes are, your left eye might see view 1, and your right eye might see view 2. If you move your head a bit to the right, this changes to the left eye seeing view 2, and the right eye now seeing view 3. You can move your head around within the 8-views and see perfect 3D. However, if you move your head too far to the right, where your left eye is seeing an image from the 1st 8-views, and the right eye sees an image from the 2nd 8-views, the 3D no longer works. Don't panic, just move your head a bit further and all will be restored to proper 3D vision.
Since Alioscopy displays are 8-view displays, we need to get the lenticular grid and the dot-per-inch image resolution to match the 8-view (1 view per pixel) encoding. The other caveat is that Alioscopy has a proprietary format to which images are encoded for their displays. What Photoshop creates for lenticular formats is not directly what Alioscopy needs for their displays. However, Alioscopy has been kind enough to provide a utility that converts to this format. So the actual process becomes as follows:
- In Photoshop – Set up the image resolution and lenticular grid to match the 8-view displays.
- In Photoshop -- decode the lenticular image, and create 8 output images--one for each view of the Alioscopy displays.
- Use the Alioscopy utility (mix8) to recombine the 8 images into an Alioscopy 8-view image.
- Display the image on the Alioscopy display, and voila it is 3D!
So now let's do it together:
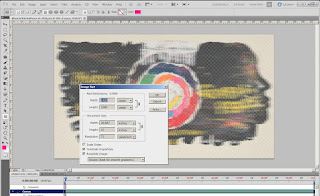
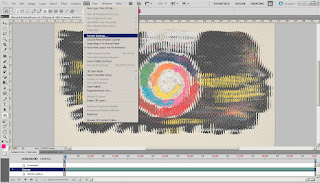
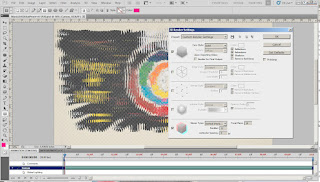
First, set up the image resolution and lenticular grid to match the 8-view displays. All the work I've done was with images set to 72dpi. To check this, go to:


Since 72dpi divided by 9 LPI, yields 8, this is exactly the 8-views we need! If you want to work at higher dots per inch you are welcome to do so, just make sure your dpi/lpi = 8 for 8-view displays like the Alioscopy.
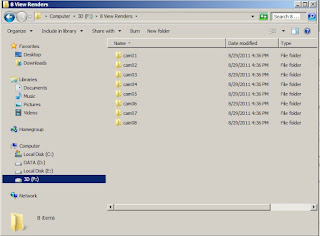
Next, we need to decode the lenticular image into eight separate images. This part was a bit tedious at first, but thankfully Pete Falco, has written a script to accomplish this. The principle of the script is to take the lenticular image, break it into pieces and write out the 8 individual images. The script assumes a specific directory structure for its output images. This structure matches the needs for the Alioscopy utility “mix8” which we will use next. The output directory structure must be:

Finally, we run the utility “mix8” which combines the 8 images back into a single image ready for viewing on an Alioscopy display.
And we are done!
.


